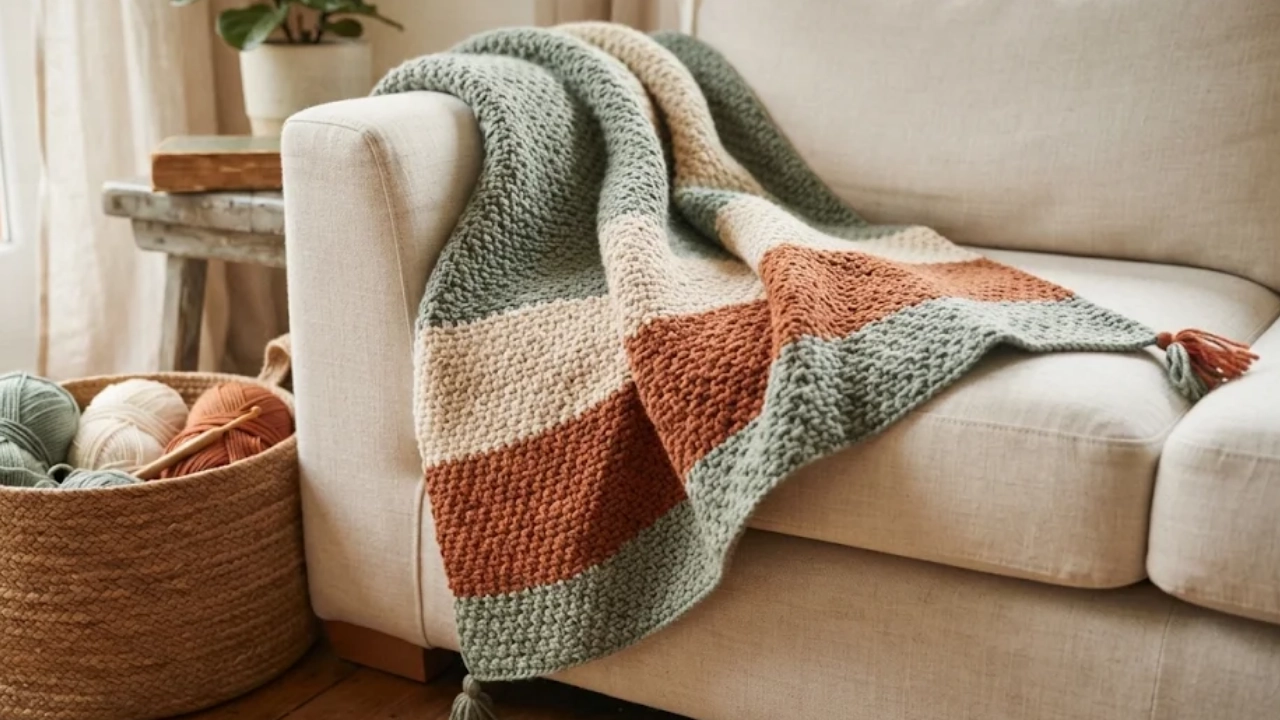
Easy Striped Moss Stitch Crochet Blanket: Free Beginner Pattern
If you’ve been looking for a blanket that looks more interesting than plain single crochet but doesn’t ask much more of you, this easy striped moss stitch crochet blanket is a good place to start. The moss stitch builds a woven-looking, slightly bumpy fabric using only two things you probably already know: chain stitches and single crochet. Add a few stripes of color and you get a blanket that looks thoughtfully designed, even though every row follows the same simple pattern.
This pattern is written for beginners. If you can chain, single crochet, and turn your work at the end of a row, you have the skills you need. Below you’ll find a materials list, an explanation of how to swatch, a step-by-step moss stitch tutorial, the full blanket instructions with stitch counts, and advice on color changes, edges, borders, and care.
Why You’ll Love This Crochet Blanket
It’s genuinely beginner-friendly. After the first row, every row uses the same short set of instructions. Once you’ve done two or three rows, you’ll likely stop needing to read the pattern.
The texture is worth it. Moss stitch makes a fabric that’s dense enough to feel cozy but still has some drape, and both sides look similar. That makes it a nice choice for a throw you’ll see from every angle.
Stripes are forgiving and fun. Color changes break up the work into small goals (“just four more rows, then new color”). They also let you use up leftover yarn or play with a palette without committing to a complicated colorwork chart.
It’s easy to resize. Because the stitch pattern repeats over an even number of chains, you can make the blanket narrower or wider by adjusting the foundation chain by two at a time. Length is simply a matter of how many rows you work.
It works in many styles. Soft neutrals look calm and modern, while bright colors turn it into a playful baby or kids’ blanket. This is also an easy crochet blanket pattern to personalize with a border.
Pattern Overview
| Detail | Information |
|---|---|
| Skill level | Beginner (uses chain, single crochet, and turning) |
| Construction | Worked flat in rows from side to side, starting with a foundation chain |
| Stitch pattern | Moss stitch (also called linen stitch or granite stitch) in single crochet and chain-1 spaces |
| Stripes | Changed at the end of a row; stripe width is up to you |
| Finished size | Depends entirely on your yarn, hook, and tension. Make a swatch and use the sizing method below. |
| Time to complete | Varies widely with blanket size, yarn, and your pace, so no fixed estimate is given here. |
Materials and Supplies
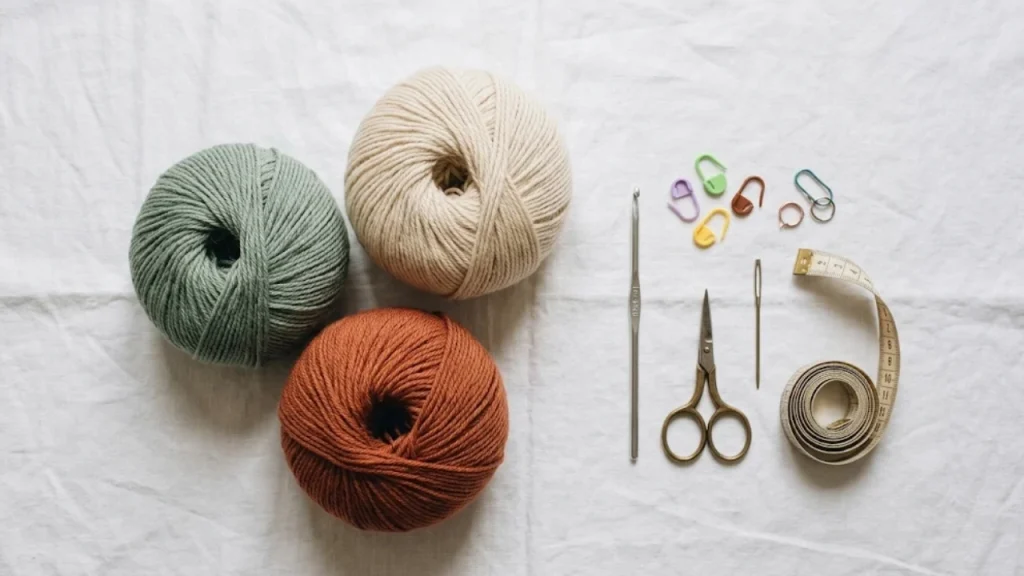
Yarn
A worsted weight yarn (category 4 in the Craft Yarn Council’s system) is a comfortable choice for a first blanket. It’s easy to find, easy to see your stitches in, and works up reasonably quickly. Other weights will work, but your swatch, yardage, and finished size will all change.
For fiber, think about how the blanket will be used:
- Acrylic or acrylic blends: Budget-friendly, widely available in many colors, and often machine washable.
- Cotton: Soft and breathable, though it has less stretch and can feel heavier when it’s large.
- Superwash wool or wool blends: Warm and springy. Check the label for washing instructions.
Choose two or more colors for your stripes. Stick with the same fiber and weight across all colors so the blanket behaves consistently when washed.
Yardage: Yarn requirements depend on the blanket size, yarn weight, hook, and your tension, so any number given here would be a guess. To estimate, weigh your finished swatch, calculate how many square inches it covers, and scale up to your target size, then add extra to be safe. Check the yardage printed on each yarn label, and buy a little more of each color than you think you need.
Hook
Use the hook size recommended on your yarn label as a starting point. For worsted weight, that is often around 5.0 to 5.5 mm (US H-8 to I-9), but confirm this against your label. Moss stitch creates a fairly dense fabric, so many crocheters like to use a hook at the larger end of the label’s range for better drape. Your swatch will tell you whether that works for you.
Other Supplies
- Scissors for cutting yarn at color changes
- Yarn needle (also called a tapestry needle) for weaving in ends
- Stitch markers to mark the first stitch of a row or the corners of your border
- Measuring tape for checking your swatch and your blanket’s width and length
Gauge and Finished Size
Gauge is how many stitches and rows fit into a given measurement. For a blanket, it’s less about hitting an exact number and more about controlling the finished size and the feel of the fabric. If your tension is tight, the blanket will come out smaller and stiffer than expected. If it’s loose, it will be larger and floppier.
How to make a moss stitch swatch
- Chain 30 (an even number).
- Work the pattern rows below for at least 15 to 20 rows. A larger swatch gives more reliable measurements.
- Lay the swatch flat without stretching it, then measure its width and height.
- Check the feel. If the fabric seems stiff, try a larger hook. If it seems loose and holey, try a smaller one.
Using your swatch to plan the foundation chain
- Divide the swatch width (in inches) by the number of chains you started with (30). That gives the approximate inches of finished width per chain.
- Divide your desired blanket width by that number to find your foundation chain.
- Round to the nearest even number. The pattern requires an even chain.
Blocking and washing can change the size slightly, especially with cotton or wool, so measure again after you’ve washed your swatch if you want a more accurate estimate. No gauge figures are given here because they depend on your yarn and hook.
Crochet Abbreviations (US Terms)
| Abbreviation | Meaning |
|---|---|
| ch | chain |
| sc | single crochet |
| sl st | slip stitch |
| st / sts | stitch / stitches |
| sp | space (here, the gap formed by a ch-1 from the previous row) |
| sk | skip |
| RS | right side |
| WS | wrong side |
| A, B, C | yarn colors, as named in the pattern |
Stitch counts are written like this: “ch-1 sp” means the space made by one chain stitch.
Special Stitch Tutorial: The Moss Stitch
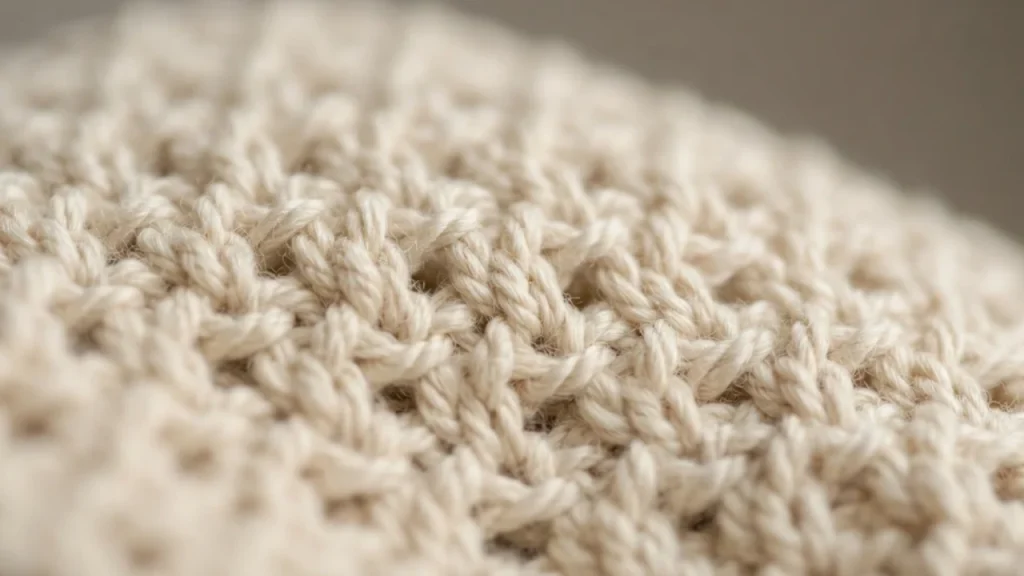
Moss stitch is sometimes called linen stitch or granite stitch. It’s made with a repeating pattern of single crochet and chain-1 spaces. In each new row, you work a single crochet into each chain space from the row below and put the chain space over each single crochet. That staggered arrangement creates the woven, pebbled texture.
Working the First Row
- After making your foundation chain, insert your hook into the second chain from the hook and work a single crochet. (The skipped chain is your turning chain.)
- Chain 1.
- Skip the next chain, then work a single crochet into the following chain.
- Repeat steps 2 and 3 across.
Working a Single Crochet in a Chain-1 Space
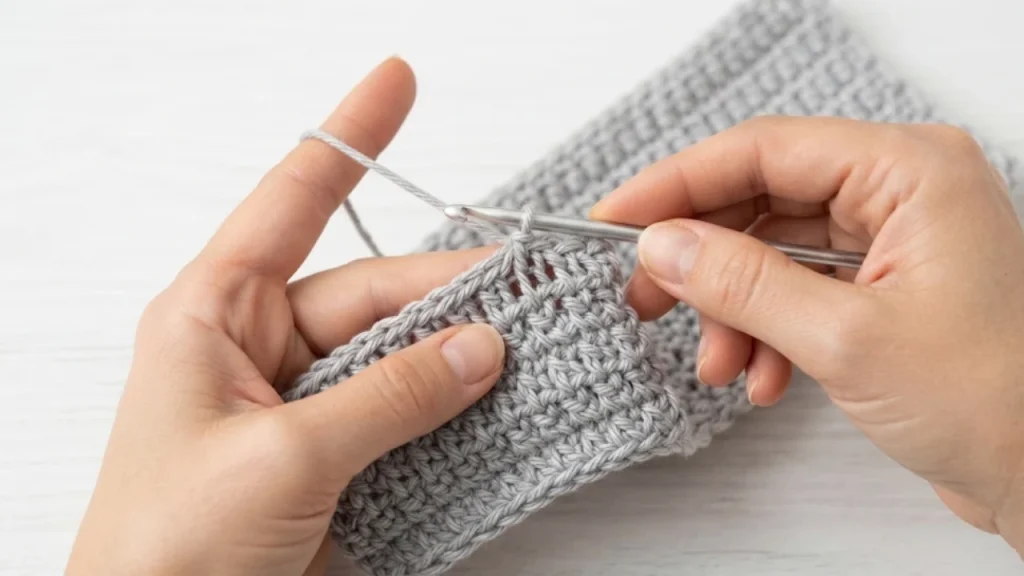
On the rows that follow, the single crochet goes into the space formed by the chain-1 from the previous row, not into the chain stitch itself. Insert your hook through the opening beneath that chain, yarn over, pull up a loop, yarn over, and pull through both loops on the hook.
Working the Following Rows
Turn your work, chain 2, and skip the first stitch. Then work a single crochet into the first chain-1 space, chain 1, skip the next single crochet, and single crochet into the next chain-1 space. Repeat across, and finish the row with a chain 1 and a single crochet in the last single crochet.
Take your time with the first few rows. Once you recognize which stitches are single crochets and which are spaces, the pattern becomes very natural to follow.
Step-by-Step Crochet Blanket Instructions
Notation: k stands for the number of single crochet stitches in each row. Every row of this blanket has k sc and (k – 1) ch-1 spaces. Your foundation chain is always 2 × k, an even number.
Worked example for checking your counts: If you chain 100, then k = 50, so every row has 50 sc and 49 ch-1 spaces.
Foundation Chain
With Color A, ch an even number. For your first attempt, chain 30 and treat it as a swatch. For a blanket, calculate your chain from your swatch as explained above.
Tip: Make the chain loosely and consistently. A tight foundation chain pulls in the bottom edge of your blanket.
Row 1 (Right Side)
Sc in the 2nd ch from hook. Ch 1, sk next ch, sc in next ch. Repeat from * across until you’ve worked a sc into the last ch. Turn.
Stitch count (Row 1): k sc and (k – 1) ch-1 sps. (Example with 100 chains: sc in the 2nd chain, then 49 repeats of “ch 1, sk 1, sc” = 50 sc, 49 ch-1 sps.)
Row 2
Ch 2, turn. Sk the first st. Sc in the first ch-1 sp. Ch 1, sk next sc, sc in next ch-1 sp. Repeat from * until you have worked into the last ch-1 sp. Ch 1, sc in the last sc. Turn.
Stitch count (Row 2): k sc and (k – 1) ch-1 sps (not counting the turning ch-2). (Example: 1 sc in the first sp, 48 repeats, then ch 1 and a sc in the last st = 50 sc, 49 ch-1 sps.)
Row 3 and Every Following Row
Repeat Row 2. Each row has the same stitch count as the last.
Edge tip: The turning ch-2 is not worked into on the next row. The edge sc of each row is worked into the last sc, so you’ll see a tidy line of chain loops along one edge and sc stitches along the other. Keep your eye on this each time you finish a row, and count your stitches (not your turning chain) on a regular basis to keep your edges straight.
Stripes
Stripe width is entirely up to you. As an example, you could work 4 rows per color, alternating between two or three colors. Whatever you choose, use an even number of rows for each stripe if you plan to carry yarn up the side (explained below), so the unused yarn is always waiting at the right edge.
Finishing the Blanket
Work rows until the blanket is the length you want, ending after a full row. Fasten off, cut the yarn, and pull the tail through the last loop. Then weave in ends and add a border, if you like.
Changing Colors for Stripes
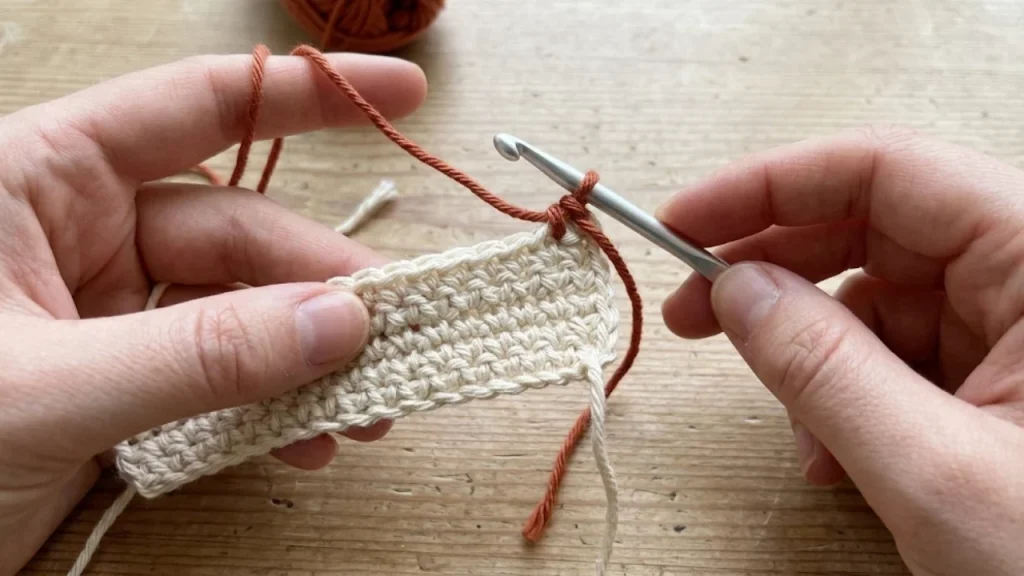
Neat stripes start with the last stitch of the previous color.
- Work the last sc of the row until you have two loops on the hook.
- Drop the old color. Yarn over with the new color and pull through both loops. That completes the stitch in the new color.
- Ch 2 with the new color, turn, and continue the pattern.
Managing yarn tails: Leave a tail of about 6 inches when you cut. If you’re changing colors every 2 to 4 rows (and always at the same edge), you can carry the unused yarn loosely up the side instead of cutting it. Keep that strand relaxed so it doesn’t pull the edge in. For wider stripes, cut and weave in the ends instead. Carried yarn on a wide stripe will make the edge bulky and may show through.
If you notice small gaps at the color change, double-check that you worked the final yarn over with the new color, rather than finishing the stitch in the old color.
Border and Finishing
Optional Border Ideas
- Simple single crochet border: Work sc evenly around the entire blanket, placing 3 sc in each corner so it lies flat. Join with a sl st to the first sc.
- Contrast border: Use one of your stripe colors, or a new neutral, for a clear frame.
- Plain finishing round: If you prefer a clean edge, one round of sc followed by a round of slip stitch around the outside creates a firm, subtle edge.
Because the number of stitches you’ll need along each side depends on your gauge, no exact border count is given here. Place your stitches evenly, aiming for about one sc per row end, and adjust so the border lies flat. If it ruffles, you’ve placed too many stitches. If it pulls in, you need more.
Weaving In Ends
- Thread the tail onto your yarn needle.
- Weave it through the backs of stitches of the same color for a few inches, following the shape of the stitches.
- Change direction and weave back the other way for a few more stitches to lock it in.
- Trim close to the work, but not so close that it can pull out.
Gently stretching the fabric as you weave helps the end sit comfortably. Check the front to make sure the yarn doesn’t show through.
Common Beginner Mistakes
Uneven edges. This usually comes from missing the last stitch of a row, or from working an extra stitch into the turning chain. Count your sc stitches every few rows. Each row should have the same count. Place a stitch marker in the first stitch if you tend to lose your place.
Inconsistent tension. If some rows look tight and others look loose, it’s often a sign of changing your grip as you get tired or stressed. Take breaks, and keep your yarn flowing evenly through your fingers. A relaxed hold is better than a tight one.
Stitches in the wrong place. In moss stitch, the single crochet goes in the space, not in the chain. If your fabric looks lumpy and your counts keep changing, you’ve probably worked into a chain instead of a space. Slow down and look at the row below before you insert your hook.
Color-change problems. Bumps or gaps at the stripe are usually caused by switching colors too early or too late. Make the switch as the last yarn over of the final stitch, and keep your carried yarn loose. If a stripe has an uneven edge, try making the change at the same side each time.
Skipping the swatch. It’s tempting, but a swatch tells you right away if your hook is too small or your fabric is too stiff. It saves hours of frogging later.
Washing and Care Instructions
Always follow the care instructions on your yarn label, since the manufacturer knows what the fiber blend can handle. In general:
- Acrylic and many acrylic blends: Often machine washable on a gentle cycle and dried on low heat, but confirm on the label.
- Cotton: Usually washable, but may shrink in high heat. Check the label, and consider air drying or low heat.
- Wool and wool blends: Superwash wool may be machine washable. Non-superwash wool typically needs gentle hand washing and flat drying to prevent felting or shrinking.
If you’re mixing yarns for stripes (which is not recommended), follow the most delicate care instructions.
To help preserve the fabric, wash your blanket in a gentle cycle in a mesh bag or pillowcase, and avoid hanging a wet blanket, because the weight can stretch it out. Dry flat if you’re unsure.
Frequently Asked Questions
How much yarn do I need?
It depends on the blanket size, the yarn weight, your hook, and your tension. To estimate, weigh your swatch, determine how much area it covers, then calculate the total weight for your target size. Add extra to be safe, and check the label for each yarn’s yardage.
Why does my blanket look wavy or curl at the edges?
Waviness usually means you’re adding or missing stitches at the edges. Count your stitches every few rows, and keep your foundation chain loose so it doesn’t pull in. If it curls, blocking and a border may help.
Is moss stitch the same as linen stitch or granite stitch?
These names are commonly used for the same single crochet and chain-space stitch pattern. You may see small differences in how patterns are written, but the texture is the same.
Can I make this blanket bigger or smaller?
Yes. Change the foundation chain in multiples of 2 to adjust the width, and work more or fewer rows to change the length. The stitch counts in each row will change accordingly: always k sc and (k – 1) ch-1 spaces, where k is half your foundation chain.
Do I have to use stripes?
Not at all. You can work the whole blanket in a single color. The pattern is exactly the same without color changes.
Which side is the right side?
Moss stitch looks very similar on both sides, so you have some freedom. For consistency, call the side facing you after Row 1 the right side, and make your border on that side.
What if I lose count?
Lay your work flat and count the single crochet stitches in the last row. If there are too many or too few, work back a few rows and correct the mistake. It’s easier to fix a small error early than to undo many rows later.
Final Thoughts
An easy striped moss stitch crochet blanket is a lovely project for building skills while making something you’ll actually use. The pattern is simple, the texture is satisfying, and the stripes let you play with color without much extra effort. Make a swatch, take your time with the first few rows, and enjoy watching the blanket grow stripe by stripe.