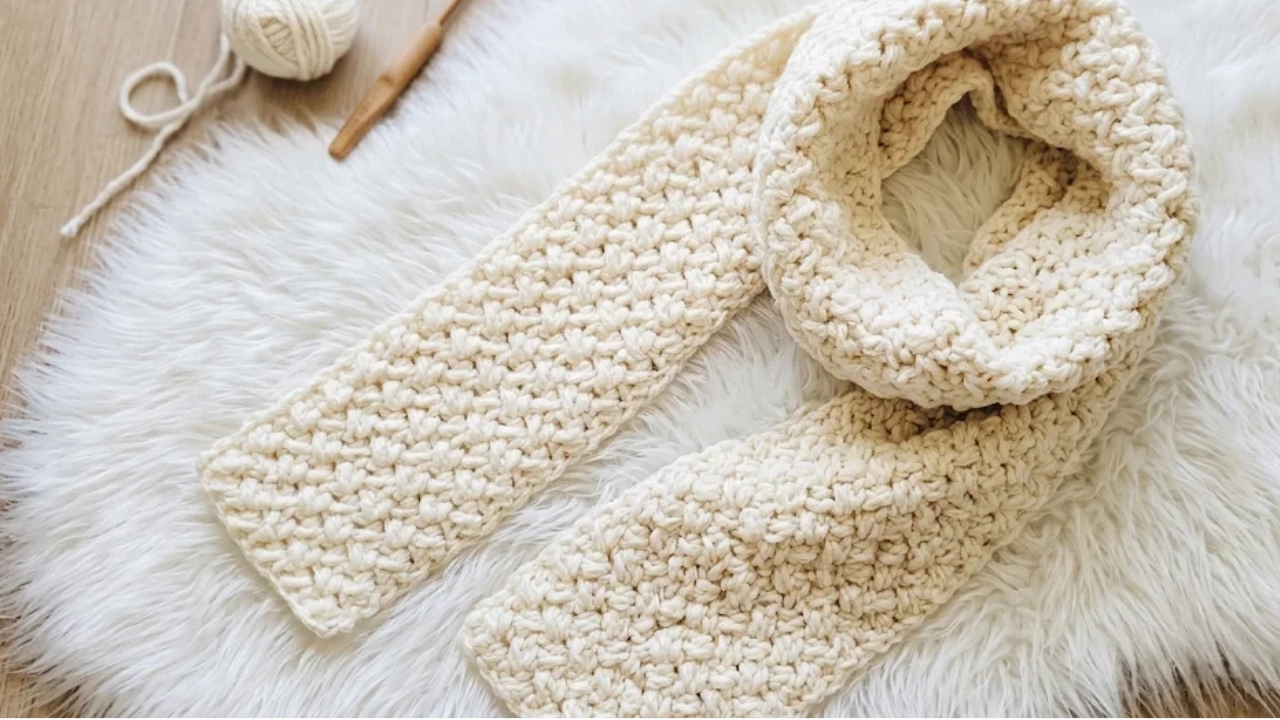
Simple Crochet Scarf: 7 Proven Steps to Your First Perfect Project
A simple crochet scarf is often the first project that teaches you what your hands can do. The rhythm of the stitches becomes automatic after a few rows, and you’re left with something warm and entirely yours.
Table of Contents
This free beginner tutorial walks you through every step. You’ll learn how to keep your edges straight, what yarn actually feels good to work with, and how many rows it takes to make a scarf that wraps twice around your neck.
Why Start with a Simple Crochet Scarf
Scarves are forgiving. If you drop a stitch in row twelve, you can fix it without unraveling the whole thing.
They don’t require shaping or counting increases. You work in straight lines until it’s long enough, then you stop.
An easy crochet scarf for beginners also shows you how yarn behaves. Some skeins feel springy in your hands, others drape like fabric. You’ll notice these things as you work.
Materials You’ll Need for This Beginner Crochet Scarf
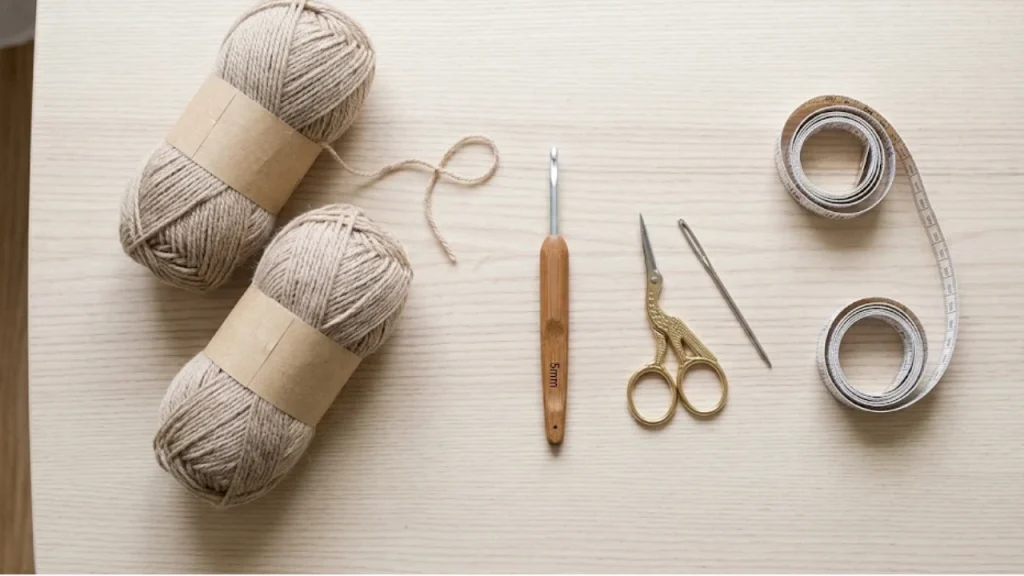
Start with a size H/8 (5mm) crochet hook. It’s large enough to see your stitches clearly but not so large that the fabric looks loose. Taking a thoughtful approach to Simple Crochet Scarf keeps the process grounded and realistic.
Choose a medium-weight yarn (labeled #4 on the wrapper). Wool blends are warm and elastic. Acrylic is budget-friendly and machine-washable.
You’ll need about 300 yards for a scarf that measures 60 inches long and 6 inches wide. Buy two skeins if you want extra length or a wider drape.
Keep a pair of scissors and a yarn needle nearby for weaving in ends. That’s it.
Understanding the Foundation Chain for Your Crochet Scarf for Beginners
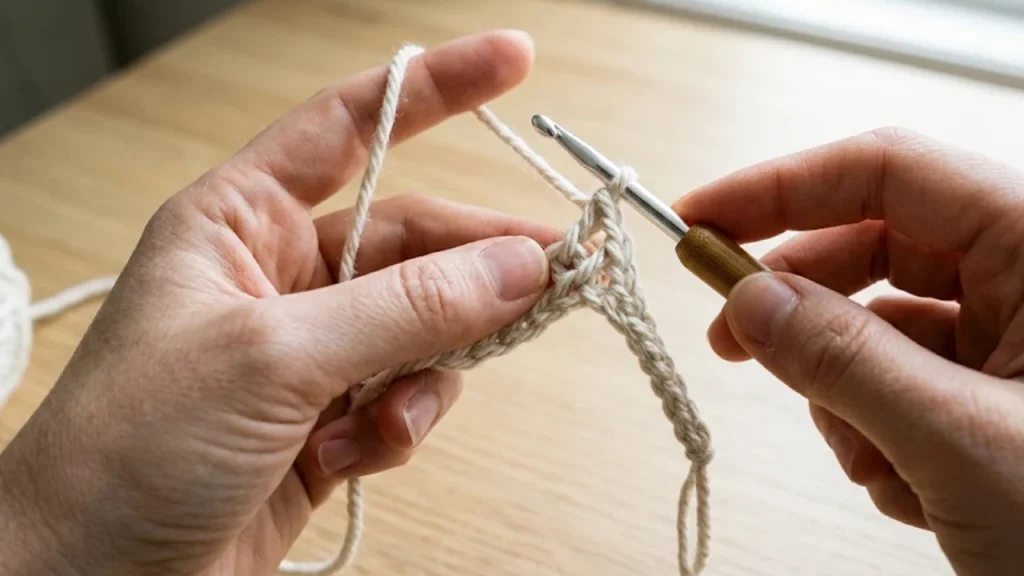
The foundation chain determines your scarf’s width. Each chain stitch adds roughly a quarter inch.
For a 6-inch-wide simple crochet scarf, chain 25. If you want it narrower, chain 20. Wider? Try 30.
Pull the yarn through each loop with steady tension. Too tight and the edge will pucker. Too loose and it’ll ripple.
Don’t worry if your first chain looks uneven. It’ll relax as you work the next row. Even small adjustments around Simple Crochet Scarf can remove unnecessary friction.
Step-by-Step Instructions: How to Crochet a Scarf
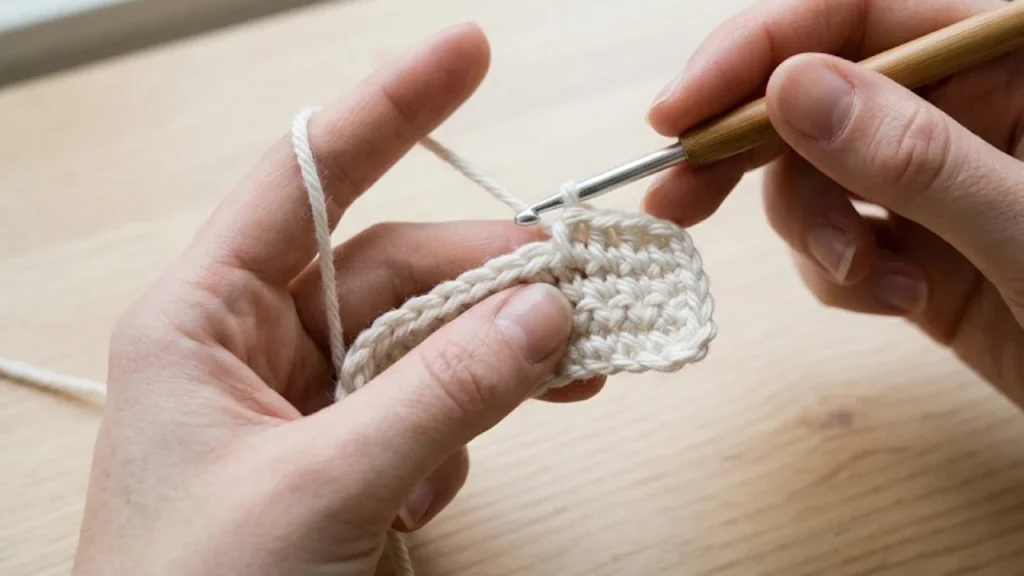
Row 1: Your First Row of Single Crochet
Insert your hook into the second chain from the hook. You’re skipping the loop on your hook—that one doesn’t count.
Yarn over and pull through. You’ll have two loops on your hook. Yarn over again and pull through both loops.
That’s one single crochet. Repeat across the entire chain.
When you reach the end, you should have 24 stitches if you chained 25. The first chain you skipped acts as a turning chain.
Row 2 and Beyond: Building Length
Chain one and turn your work. This brings the yarn to the correct position for the next row.
Work one single crochet into each stitch across. Insert your hook under both loops at the top of each stitch from the previous row.
This free crochet scarf pattern uses only single crochet. No double crochets, no half doubles. Just the same stitch, over and over. In practice, mastering Simple Crochet Scarf comes down to consistency rather than perfection.
After ten rows, your hands will move without thinking. The motion becomes automatic.
Keeping Your Edges Straight
The most common beginner mistake is losing or gaining stitches. Your scarf starts to look like a trapezoid instead of a rectangle.
Count your stitches at the end of every few rows. You should have the same number each time—24 if you started with a chain of 25.
Mark the first and last stitch of each row with a safety pin or stitch marker. It helps you see exactly where to insert your hook.
If you accidentally skip the last stitch, your edges will slant inward. If you work into the turning chain by mistake, they’ll flare outward.
How Many Rows for a Full-Length Simple Crochet Scarf
A 60-inch scarf takes about 200 rows of single crochet with medium-weight yarn and an H/8 hook. That’s roughly 8 to 10 hours of work if you’re new.
Measure as you go. Lay your scarf flat every 50 rows and check the length. Keeping Simple Crochet Scarf simple and adaptable makes it much easier to sustain over time.
If you want a scarf that wraps once loosely, stop at 50 inches. For a double wrap, aim for 70 inches or more.
The fabric will relax slightly after you finish, so it’s fine to stop an inch or two short of your target.
Choosing Yarn for an Easy Crochet Scarf for Beginners
Solid colors show your stitches clearly. You can see if you’ve missed a loop or twisted a stitch.
Variegated yarn hides mistakes, but it also hides your progress. You won’t notice uneven tension as easily.
Avoid anything labeled “fuzzy,” “eyelash,” or “bouclé” for your first project. The fibers obscure your stitches completely.
Wool and wool blends have a slight grip, which helps your stitches stay in place. Acrylic is smooth and slippery—good for speed once you’re confident, tricky when you’re learning.
Washability matters. If you plan to wear your scarf daily, choose something machine-washable. Superwash wool and acrylic both work. Many people notice that revisiting Simple Crochet Scarf with fresh eyes opens up better options.
Finishing Your Beginner Crochet Scarf
When your scarf reaches the length you want, cut the yarn, leaving a 6-inch tail. Pull the tail through the last loop on your hook.
Thread the tail onto a yarn needle. Weave it through the back of several stitches along the edge, then trim it close.
Do the same with the tail from your starting chain. Weaving in ends keeps them from unraveling over time.
Some people add fringe. Cut 40 to 50 pieces of yarn, each about 10 inches long. Fold each piece in half, pull the loop through the edge of your scarf with your hook, and thread the ends through the loop.
Fringe adds weight and movement. It’s optional.
Common Problems and How to Fix Them
Edges That Curl Inward
Single crochet naturally wants to curl slightly. Blocking helps.
Wet your finished scarf with cool water, roll it in a towel to remove excess moisture, then lay it flat on a blocking mat or folded towel. Pin the edges straight and let it dry completely. Paying attention to the nuances of Simple Crochet Scarf helps avoid common missteps.
The fabric will relax and the curling will ease. It won’t disappear entirely, but it’ll be far less noticeable.
Uneven Tension
Your first few rows might look tighter than the middle section, and the last rows might loosen up again. That’s normal.
Your hands are learning. Tension evens out with practice.
If the difference is dramatic, frog (unravel) the uneven section and redo it. But minor variations won’t show once the scarf is worn and washed a few times.
Losing Count of Rows
Use a row counter or keep a tally on paper. Every time you complete a row, click the counter or make a mark.
If you forget, you can count the rows by looking at the side edge of your scarf. Each row creates a small horizontal ridge.
Styling and Wearing Your Simple Crochet Scarf
A handmade scarf doesn’t need to match everything. It’s the anchor piece. A clear framework for Simple Crochet Scarf turns vague intentions into practical action.
Drape it loosely for a casual look. Wrap it twice and tuck the ends for warmth.
Neutral tones—charcoal, oatmeal, rust—pair with most coats and jackets. Jewel tones add a deliberate accent.
Wash your scarf according to the yarn label. Most acrylics tolerate the washing machine on a gentle cycle. Wool blends do better with hand washing in cool water and a bit of wool-safe detergent.
Lay it flat to dry. Hanging stretches the fabric unevenly.
What to Make After Your First Simple Crochet Scarf
Once you’ve finished this beginner crochet scarf, your hands know the mechanics. You can work without looking at your hook.
Try an easy crochet coaster pattern next. Coasters use the same single crochet stitch but require shaping and working in the round.
Or move to a small blanket. An easy striped moss stitch crochet blanket teaches you texture without complicated stitch combinations. Focusing on what matters most in Simple Crochet Scarf saves both time and mental energy.
Each project builds on the last. Scarves teach you straight rows and tension. Coasters teach you circles. Blankets teach you patience.
Tips for Maintaining Consistent Stitch Tension
Hold the yarn loosely in your non-dominant hand. Let it flow through your fingers without gripping it.
Your hook does the work, not your hand. If your fingers ache after 20 minutes, you’re holding too tight.
Take breaks every 30 rows. Stretch your hands, roll your wrists, look away from your work.
According to research from the Harvard Medical School, repetitive hand motions benefit from regular pauses to prevent strain.
Tension improves naturally over time. Don’t force it.
How This Free Crochet Scarf Pattern Compares to Others
Most beginner patterns use single crochet because it’s dense and warm. Some tutorials suggest half double crochet for faster progress, but the fabric ends up looser and less structured. Taking a thoughtful approach to Simple Crochet Scarf keeps the process grounded and realistic.
This simple crochet scarf uses a straightforward rectangle shape. No increases, no decreases, no stitch pattern changes.
You could add stripes by switching yarn colors every 10 or 20 rows. You could substitute double crochet for a lacier look. But the foundation—straight rows of a single stitch—remains the same.
Why This Easy Crochet Scarf for Beginners Works
The pattern has no weak points. Every row is identical, so you can’t get lost.
The materials are cheap. A $6 skein of acrylic and a $4 hook will get you through the entire project.
And it’s useful. You’ll actually wear this. It won’t sit in a drawer.
That’s the real test of a beginner project—not whether it’s easy, but whether it’s worth finishing.
Frequently Asked Questions
How long does it take to crochet a simple crochet scarf?
Most beginners finish a 60-inch scarf in 8 to 12 hours of active work. That’s spread over several days or weeks, depending on how much time you have.
What’s the easiest stitch for a beginner crochet scarf?
Single crochet is the easiest and most forgiving. It creates a dense, warm fabric and doesn’t require complex hand movements.
Can I make this scarf wider or narrower?
Yes. Add or subtract chains from your foundation row. Each chain adds about a quarter inch of width.
Do I need to block my finished scarf?
Blocking isn’t required, but it helps the fabric lie flat and evens out any tension irregularities. Wet your scarf, reshape it, pin it flat, and let it dry.
What if I run out of yarn before the scarf is long enough?
Join a new skein by leaving a 6-inch tail from the old yarn and a 6-inch tail from the new yarn. Work over both tails for a few stitches, then weave them in later.
How do I keep my scarf from twisting?
Make sure you’re inserting your hook under both loops of each stitch. Working under only one loop creates a twisted fabric.