Crochet Christmas Wreath: Easy Beginner Tutorial
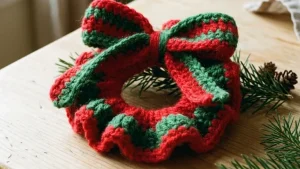
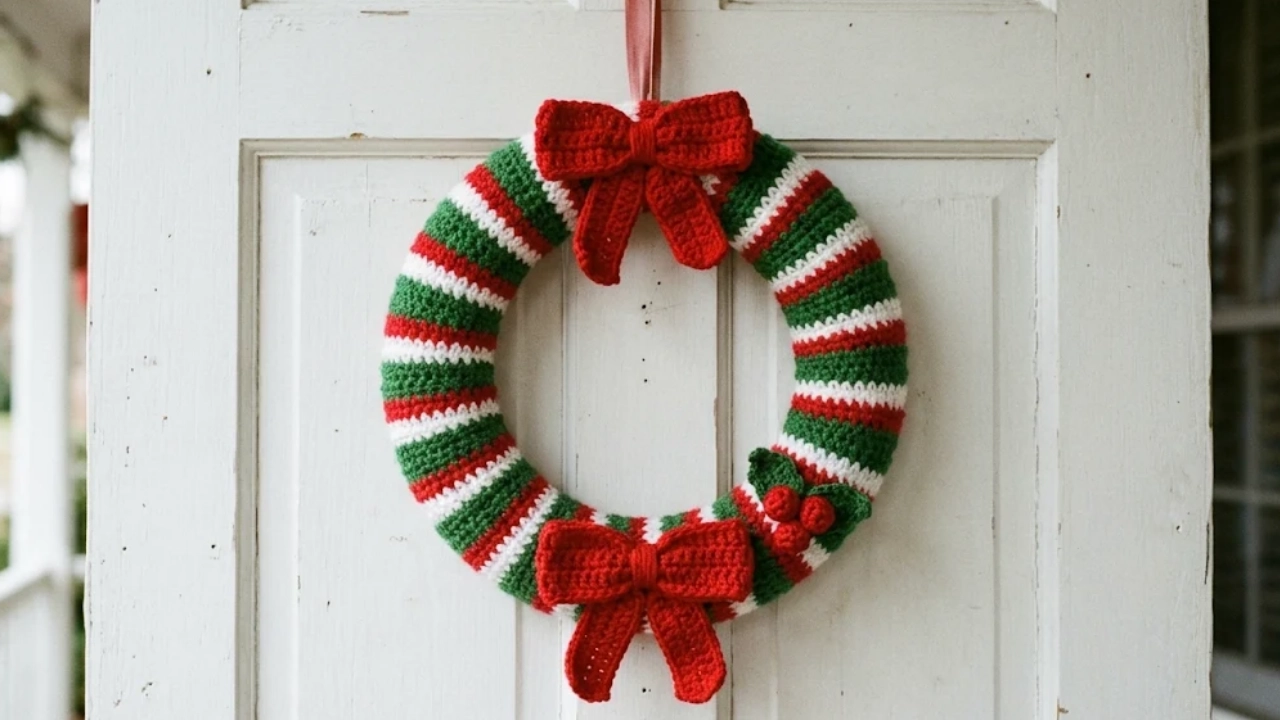
A crochet Christmas wreath is one of those projects that looks like it took real skill, but it’s built from a flat strip of single crochet wrapped around a ring. If you can chain, single crochet, and change colors, you have everything you need. Add a couple of bows and some small red berries, and you have a handmade decoration for your door or wall that you can reuse every year.
This tutorial walks you through the whole process: choosing a wreath form, making the striped cover, shaping the bows and berries, and putting it all together. The stitch counts are written for an example size, and you’ll adjust the length to fit your own wreath form.
Why Make a Crochet Christmas Wreath
It’s simple stitch-wise. The whole cover is single crochet, with every row the same.
Stripes do the decorating. Green, white, and red rows give the classic holiday look without any complicated colorwork.
It’s reusable. Unlike a pine wreath, a crochet one can be stored and brought out each December.
It scales easily. Any ring size works, because you set the strip length by measuring your own form.
It makes a good gift. A finished wreath, wrapped in tissue paper, is a thoughtful handmade present.
Pattern Overview
| Detail | Information |
|---|---|
| Skill level | Beginner (chain, single crochet, color changes, simple sewing) |
| Construction | A flat striped strip, wrapped around a wreath form and seamed |
| Stitch | Single crochet |
| Finished size | Depends on the wreath form you choose |
| Time | Varies by crocheter, so no estimate is given |
Materials and Wreath Form Options
Yarn
Worsted weight (category 4) yarn in green, white, and red works well. Acrylic is practical for decorations because it holds its color and shape, but it is heat-sensitive (see the safety note below). Cotton is also fine. Use the same weight and fiber for all colors so the strip stays even. Yardage depends on the size of your wreath form, your hook, and your tension, so no number is given here. Check your yarn labels, and buy a little extra of the main color.
Hook
Use the hook size on your yarn label, or one size smaller for a denser cover that hides the form. Make a small swatch first: the fabric should be firm enough that the form doesn’t show through.
Wreath Form
You have a few options:
- Foam wreath form: easy to cover and lightweight.
- Straw wreath form: sturdy but bulky and messy.
- Wire wreath frame: wrap it with batting or fabric first so it has some padding.
Choose a form in a size you like. The measurements you take from it, described below, set your strip length and width.
Other Supplies
- Yarn needle
- Scissors
- Measuring tape
- Stitch markers
- Pins or sewing clips
- Small amount of fiberfill (for the berries)
- Ribbon or cord for hanging
- Optional: hot glue or fabric glue for attaching decorations
Abbreviations (US Terms)
| Abbreviation | Meaning |
|---|---|
| ch | chain |
| sc | single crochet |
| inc | increase: 2 sc in the same stitch |
| dec | decrease: 2 sc worked together |
| MR | magic ring |
| sl st | slip stitch |
| st(s) | stitch(es) |
| ( ) | total stitches at the end of the row or round |
How to Read This Pattern
The cover is worked in flat rows: at the end of each row, ch 1 and turn. The turning chain does not count as a stitch. The number in parentheses is the number of stitches in the row, which stays the same for every row of the cover.
The bows are also worked in flat rows. The berries are worked in a spiral from a magic ring: don’t join or turn, and place a stitch marker in the first stitch of each round.
Measure Your Wreath Form First
Everything in the next section depends on two measurements. Take them before you start.
- Length of the strip: run a piece of yarn or a flexible measuring tape around the middle of the ring (halfway between the inner and outer edges). This is the length your strip must cover. Aim to make the strip slightly short of this length, so the cover fits snugly. The stretch of the fabric will help, but test it.
- Width of the strip: wrap the tape around the thickness of the ring, over the top and back down underneath, and back to where you started. This is the distance your rows must cover when the strip is wrapped around the ring.
Write both numbers down. You’ll compare your swatch to them.
Crochet Wreath Pattern Instructions
Example size: the counts below use a foundation chain of 61, which gives 60 sc per row. This is only an example to show how the pattern works. Your own chain depends on your yarn, hook, and the measurement from your wreath form, so use the swatch method below to find your number.
Find Your Foundation Chain
- Chain 31 and work 6 to 8 rows of sc (30 sc per row), following the Row 1 and Row 2 instructions below.
- Lay the swatch flat without stretching it and measure its width.
- Divide the swatch width by 30 to get the width of one stitch, then divide the length of your strip (the middle-of-the-ring measurement) by that number. That’s the number of sc you need per row.
- Add 1 for the foundation chain. The number of stitches doesn’t have to be even or a multiple of anything, since this is plain single crochet.
- Measure the rows in your swatch the same way to see how many rows you need to cover the thickness of your form.
Stripe Sequence
The cover is worked in stripes that run along the length of the ring. A balanced example sequence is:
- 2 rows green
- 1 row white
- 2 rows red
- 1 row white
- 2 rows green
That’s 8 rows in the example. If your wreath form is thicker, add extra rows of green at the start and end, since green is the base color, until the strip is wide enough to wrap around your form. Keep the sequence symmetrical so the stripes look balanced from the front. If you want to work the pattern as written, use a form that your measured width will match, and adjust it using the green rows.
Foundation Chain
With green, ch 61. Make it loose, not tight, so the edge doesn’t pull in.
Row 1 (Green)
Sc in the 2nd ch from the hook and in each ch across. Ch 1, turn. (60 sc)
Row 2 (Green)
Sc in each st across. Ch 1, turn. (60 sc)
Row 3 (White)
Change to white (see the color change section below). Sc in each st across. Ch 1, turn. (60 sc)
Rows 4 and 5 (Red)
Change to red. Sc in each st across, ch 1, and turn at the end of each row. (60 sc)
Row 6 (White)
Change to white. Sc in each st across. Ch 1, turn. (60 sc)
Rows 7 and 8 (Green)
Change to green. Sc in each st across, ch 1, and turn at the end of Row 7. After Row 8, fasten off. (60 sc)
Continue as Needed
If your measured width is larger than the 8 example rows give you, work additional green rows at the start and end, keeping the stripe order symmetrical. Count your stitches every few rows to confirm you still have 60 (or your own number).
Changing Colors Neatly
- Work the last sc of the row until two loops remain on the hook.
- Drop the old color. Yarn over with the new color and pull through both loops.
- Ch 1 with the new color, turn, and continue.
Because the stripes are only one or two rows tall, you can carry the unused color loosely up the side of the strip and pick it up when you need it. Keep the carried yarn relaxed so the edge doesn’t pucker. If a color won’t be used again for many rows, cut it and weave in the end instead.
Assembling the Wreath Cover
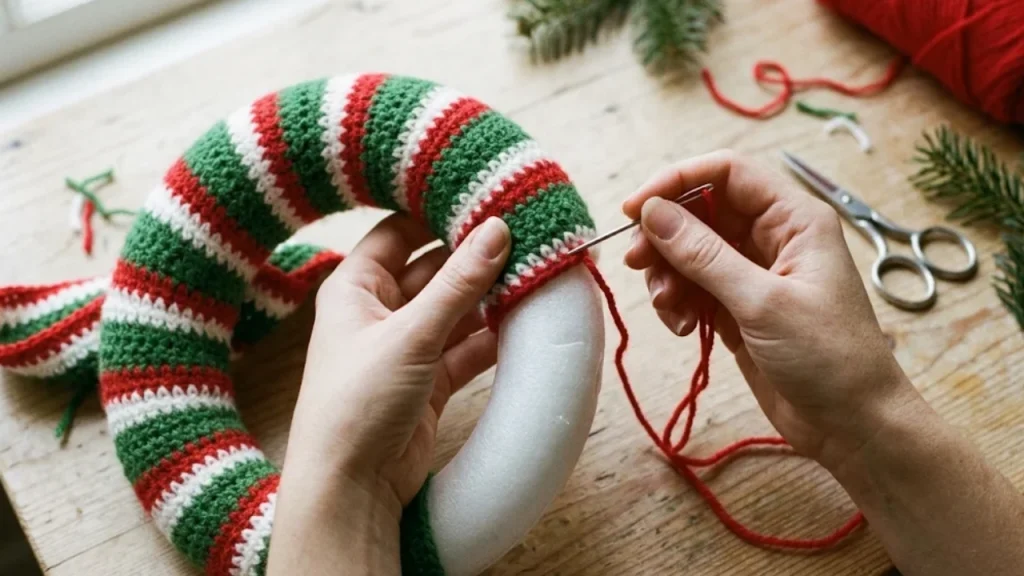
- Check the fit. Wrap the strip around your form with the right side facing out, and make sure the two long edges meet underneath (or on the back) and that the strip is long enough to go around the ring.
- Seam the long edges. Pin or clip the two long edges together, then sew them with a yarn needle using a whip stitch or mattress stitch, or join them with a row of sc through both edges. Work the seam on the back of the wreath, where it won’t show.
- Close the ring. Bring the two short ends of the strip together and sew them, again at the back or hidden under a bow.
- Weave in all ends. Run each tail through the stitches for a few inches, change direction, and trim.
If the cover is loose, sew in small gathering stitches along the seam on the back. If it’s too tight to close, you may need to remove a few rows, so test the fit before you cut the yarn.
Making the Bow and Holly Berries
Bow
You need three small pieces. The sizes below are examples, and you can scale them up or down to suit your wreath.
Bow rectangle: With red, ch 13. Sc in the 2nd ch from the hook and in each ch across. Ch 1, turn. (12 sc) Work sc in each st across for rows 2 to 16, ch 1 and turn at the end of each. (12 sc per row, 16 rows total.) Fasten off, leaving a long tail.
Center wrap: With red, ch 7. Sc in the 2nd ch from the hook and in each ch across. (6 sc) Ch 1, turn, and work sc in each st across until the strip is long enough to wrap around the middle of the folded bow rectangle and meet at the back. Fasten off, leaving a tail for sewing.
Tails (make 2): With red, ch 9. Sc in the 2nd ch from the hook and in each ch across. (8 sc) Ch 1, turn, and work 9 more rows of sc in each st across (10 rows total, 8 sc per row). Fasten off, leaving a tail for sewing.
Assembly: Fold the bow rectangle in half so the short ends meet in the middle at the back, then pinch the center and wrap the center strip around it. Sew the strip closed at the back. Sew the two tails to the back of the bow, angled in a V. Sew the bow onto the wreath.
These bow measurements are examples that need testing with your yarn and hook. Make one and hold it against your wreath to check the proportions before you sew it on.
Holly Berries (make 3 or more)
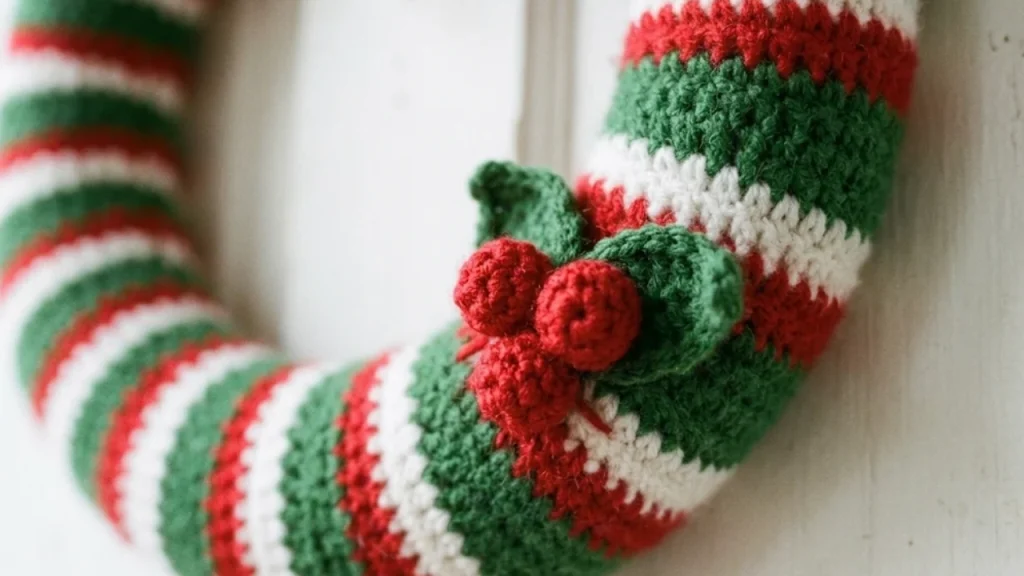
With red:
Round 1: 6 sc in MR (6)
Round 2: inc in each st around (12)
Round 3: dec 6 times (6)
Stuff lightly with a small amount of fiberfill before the last decreases if needed. Fasten off, leaving a tail. Thread the tail through the last 6 stitches, pull closed, and sew the berry onto the wreath in a small cluster of three. Add small green leaves if you like, made as simple flat ovals.
For a safer, kid-friendly option, skip the stuffing and sew the berries on firmly, or use felt circles instead.
Color Combination Ideas
- Classic: green base with white and red stripes (as in this pattern)
- Cozy cabin: deep green, cream, and burgundy
- Winter white: white, silver-gray, and pale blue
- Gold accent: green and red with a single gold or metallic-look row (test the yarn first, since some metallic yarns are harder to handle)
Troubleshooting
The strip is too short to go around the ring. Add rows in the stripes to widen it, or crochet a short extension strip in green and sew it on at the back. For the length, you can also chain more stitches next time.
The strip is too long and the cover bunches. Sew a slightly deeper seam at the short ends, or rework the strip with a shorter chain.
The wreath form shows through. Use a smaller hook, a darker yarn, or a thin layer of batting over the form.
The edges are wavy. Count your stitches every few rows, and don’t work into the turning chain.
The stripes look uneven at the edge. Change colors on the last stitch of the row, and carry yarn loosely.
The bow looks floppy. Use a smaller hook or a stiffer yarn, or stitch a few small stitches through the center to hold the fold.
Care and Storage
Spot clean with a damp cloth and mild soap, and let it dry completely. Don’t wash it with the form inside, since foam and straw can be damaged. Store the wreath in a breathable box or bag with tissue paper, away from direct sun, so the colors don’t fade.
Safety note: many yarns, especially acrylic, can burn or melt when exposed to heat. Keep your wreath away from candles, fireplaces, space heaters, and string lights that run hot. If you hang it near a light source, use LED lights.
Frequently Asked Questions
What yarn is best for a crochet Christmas wreath?
Smooth worsted weight yarn in acrylic or cotton is a good starting point. Use the same weight for all colors.
What size wreath form should I use?
Any size works, as long as you measure it to set the strip length. Smaller forms are easier for a first project.
Can I use a wire wreath frame instead of foam?
Yes, but pad it first with batting or fabric so the cover doesn’t look lumpy.
How do I make the pattern bigger or smaller?
Change the foundation chain to adjust the length, and the number of rows to adjust the width. The stitches per row are always one fewer than your chain.
Can I make it in the round instead of a strip?
Yes, but that needs a different stitch formula for a donut shape, so it’s best to follow a separate pattern designed for that.
How do I hang a crochet wreath?
Sew or tie a ribbon loop to the back, or use an over-the-door wreath hanger.
Can I sell wreaths made from this pattern?
Yes, you’re welcome to sell finished items made from our free pattern, as long as you credit CozyHooked and link back to it. Please don’t sell or share the pattern itself.
Final Thoughts
A crochet Christmas wreath is a satisfying project that looks impressive but is really just a striped strip, a few small pieces, and a bit of sewing. Measure your form, make a swatch, and take your time with the fit. Once it’s finished, hang it up, and pull it out again next December.