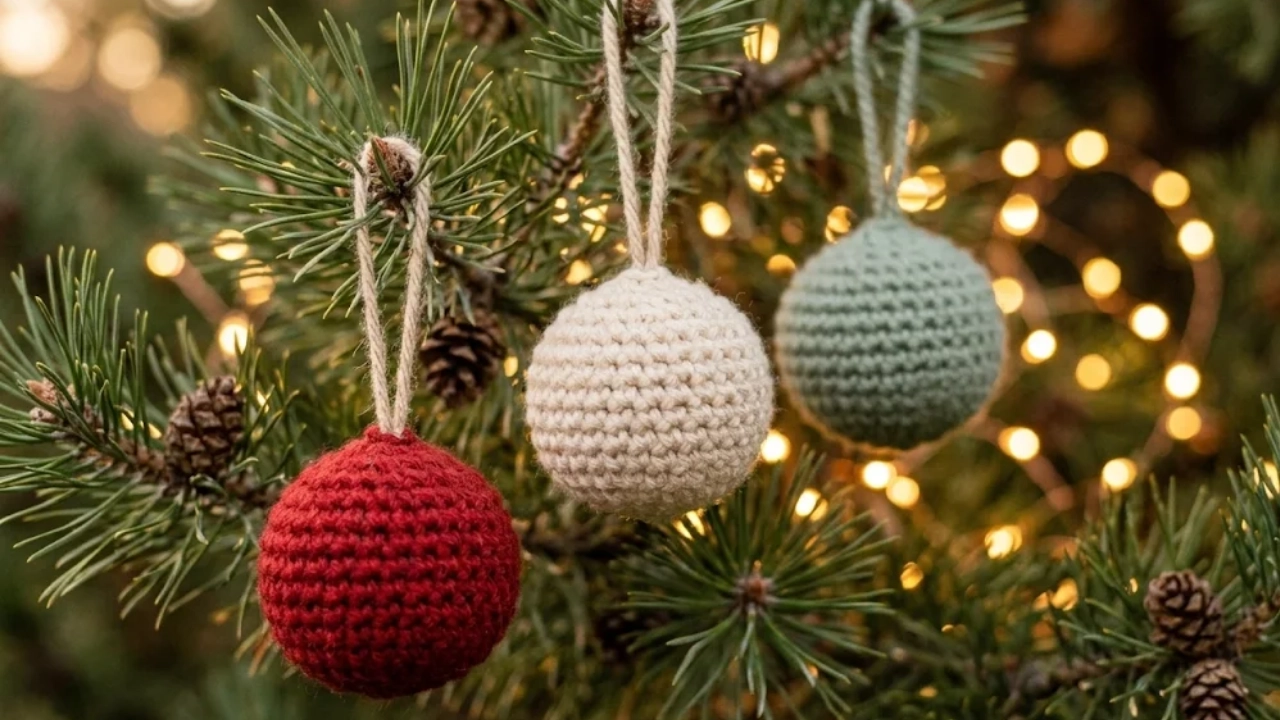
Crochet Christmas Ornaments for Beginners: Tips, Techniques & a Simple Starter Pattern
Few things say “handmade holiday” like a tiny crocheted ornament hanging on a tree. They’re small, they work up fast, and they make thoughtful gifts. They’re also a great way to learn amigurumi, the Japanese-style technique of crocheting small stuffed shapes.
If you’re searching for crochet Christmas ornaments for beginners, this guide covers what you actually need to know before picking a pattern: which yarn and hook to use, how to start in a magic ring, how to stuff and assemble, and how to add a hanging loop. At the end, you’ll find a simple round ornament you can use as practice.
Why Crochet Ornaments Are a Good Beginner Project
They’re small. A finished ornament can take just a few short sessions, so you get the satisfaction of finishing without a big commitment.
They teach core skills. Most amigurumi uses only a few stitches: single crochet, increases, and decreases. Learn these on a small piece and you can make nearly any amigurumi project later.
Mistakes are cheap. If a piece comes out lumpy, you’ve used a few yards of yarn, not a whole skein. Try again.
They work as gifts. A set of three or four ornaments, wrapped in tissue paper, is a lovely handmade present.
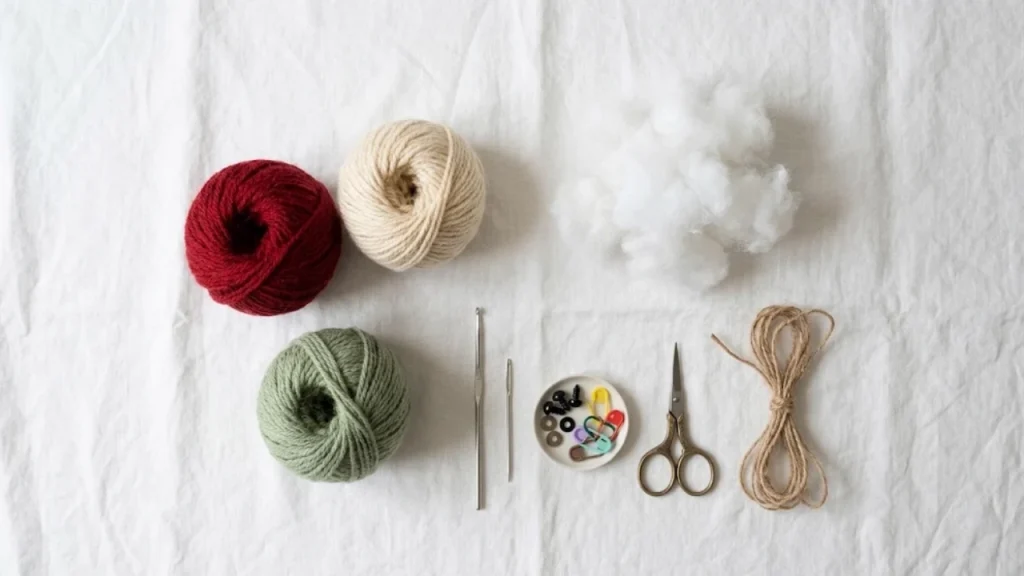
What You’ll Need
Yarn
Smooth, medium-weight yarn is easiest to start with. Worsted weight (category 4) or DK weight (category 3) both work. Choose yarn with:
- A smooth, tightly plied texture. Fuzzy or loosely spun yarn makes stitches hard to see.
- A light to medium color. Dark colors hide your stitches, which makes counting difficult.
- Cotton or acrylic fibers. Cotton gives clean stitch definition. Acrylic is affordable and comes in bright holiday colors.
Ornaments use very little yarn, so scraps are perfect. Exact yardage depends on size, yarn and tension, so check your yarn label and use leftover yarn first.
Hook
Amigurumi is worked tightly so the stuffing doesn’t show through. A common approach is to use a hook one or two sizes smaller than the one recommended on your yarn label. Make a small test piece. If you can see stuffing between stitches, go down a hook size.
Other Supplies
- Polyester fiberfill for stuffing
- Yarn needle for sewing pieces and hiding ends
- Stitch marker to mark the start of each round
- Small scissors
- Safety eyes or embroidery thread if your ornament has a face
- Ribbon, twine or cord for hanging
Key Techniques for Crochet Ornaments
Working in Continuous Rounds
Most amigurumi is worked in a spiral, not joined rounds. You don’t turn or join at the end of each round. Instead, place a stitch marker in the first stitch of every round, move it up as you go, and count your stitches at the end of each round.
The Magic Ring
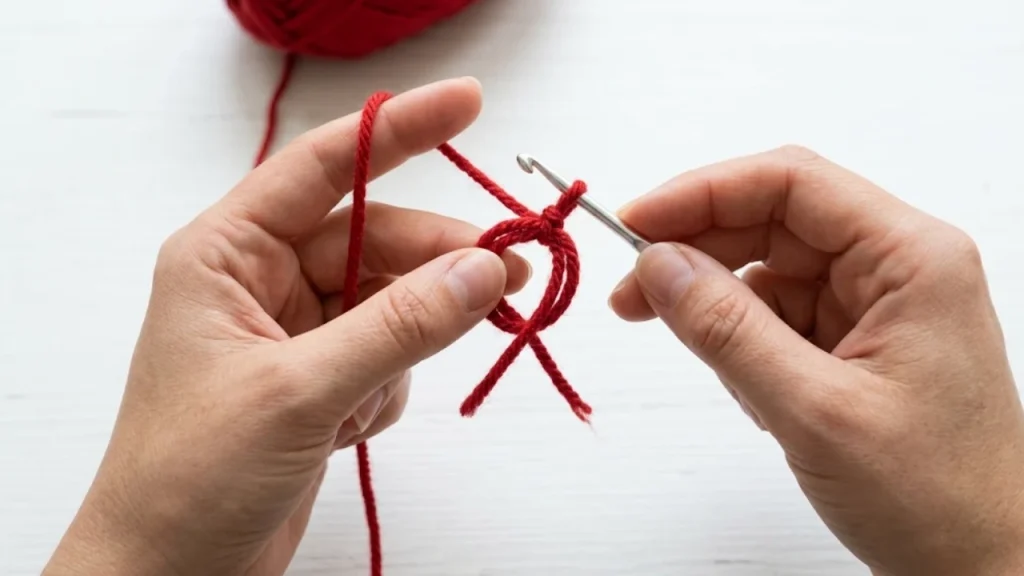
A magic ring (also called a magic circle) lets you start a round with a tightly closed center, which is ideal for amigurumi.
- Wrap the yarn around two fingers to make a loop.
- Insert your hook through the loop, catch the working yarn, and pull up a loop.
- Chain 1 to secure it.
- Work your first round of stitches into the ring, covering both the loop and the tail.
- Pull the tail to close the center.
If you struggle, practice with thick yarn first. Many beginners find it easier to start with a chain-2 ring (working stitches into the second chain from the hook) until the magic ring feels comfortable.
Increases and Decreases
An increase (inc) means two single crochets in the same stitch. It makes the piece wider.
A decrease (dec) shrinks the piece. The invisible decrease is neater than the standard version. Insert your hook into the front loop only of the next two stitches, yarn over, pull through both loops, yarn over, and pull through the two loops on the hook. The decrease sits flat and leaves fewer gaps.
Stuffing
Stuff before you close the piece, and a little at a time. Use small pieces of fiberfill, and push them into the shape with the back of your hook. Underfilled ornaments look floppy, while overfilled ones stretch the stitches. Aim for firm but not hard.
Closing the Opening
After your final decrease round, cut the yarn, leaving a tail. Thread it through the remaining stitches with your yarn needle, pull tight, and tie off. Push the tail into the piece to hide it.
Changing Colors
To switch colors in a spiral round, finish the last stitch of the old color until two loops remain on the hook, then pull the new color through both loops. Carry the old yarn loosely inside the piece only for short distances. For larger color areas, cut and weave in ends.
A Simple Starter Ornament: The Round Bauble
This is a basic ball shape, a good first ornament to practice the magic ring, increases, decreases and stuffing. All instructions use US crochet terms.
Abbreviations: MR = magic ring, sc = single crochet, inc = 2 sc in the same stitch, dec = invisible decrease, st(s) = stitch(es). Numbers in parentheses are your total stitches at the end of the round.
Round 1: 6 sc in MR (6)
Round 2: inc in each st around (12)
Round 3: [sc, inc] repeat 6 times (18)
Round 4: [2 sc, inc] repeat 6 times (24)
Rounds 5–8: sc in each st around (24)
Round 9: [2 sc, dec] repeat 6 times (18)
Round 10: [sc, dec] repeat 6 times (12)
Stuff firmly now.
Round 11: dec 6 times (6)
Fasten off, leaving a tail. Thread the tail through the front loops of the last 6 stitches, pull closed, and hide the end.
Hanging loop: Cut a piece of ribbon or yarn, thread it through the top of the ornament with your needle, and tie the ends into a knot.
Make it yours: Change colors every two or three rounds for stripes, or embroider small details with contrasting yarn once it’s finished.
Note: stitch counts above are mathematically consistent, but finished size depends on your yarn and hook, so no measurements are given.
Adding Details
Safety Eyes vs. Embroidered Eyes
Safety eyes are plastic eyes with a locking washer. Insert them before stuffing, and check their position before locking them. Embroidered eyes (small black stitches or French knots) are a better choice if the ornament may end up near babies or small children, since there are no small parts to detach. Even “safety” eyes can be a choking hazard if they come loose, so ornaments are decorations, not toys.
Sewing Pieces Together
Use pins to position parts (ears, arms, a hat) before sewing. Thread a yarn needle with the leftover tail, and sew with small, tight stitches through the back loops of the part and the body. Take your time here. Crooked placement is the most common reason handmade ornaments look “off.”
Hanging Options
- A loop of ribbon or twine knotted through the top
- A crocheted chain (ch 15–20 or so, then sewn into place)
- A small metal ornament hook, if you don’t want a loop
Common Beginner Mistakes (and Fixes)
Gaps showing stuffing. Switch to a smaller hook or tighten your tension.
Counting problems. Count at the end of every round, and use a stitch marker. If your count is off, rip back and fix it right away.
Lumpy shape. Usually from uneven stuffing. Add stuffing in small amounts and mold the shape with your hands as you go.
Visible color-change jogs. Make color changes at the same point every time, and try the invisible method described above.
Stitches too tight to work. Relax your grip. If it still feels hard, go up a hook size.
Care and Storage
Handmade ornaments are delicate. Spot clean with a damp cloth and mild soap rather than machine washing, especially if you’ve used glued parts. Store them in a dry box with tissue paper, away from direct sunlight, so colors don’t fade. Keep them away from candles, fireplaces and other heat sources, since many yarns, especially acrylic, are flammable or can melt.
Frequently Asked Questions
What is the best yarn for crochet Christmas ornaments?
Smooth worsted or DK weight cotton or acrylic is easiest for beginners. Light colors make stitches easier to see.
What hook size should I use?
Start with a hook one or two sizes smaller than the yarn label suggests, then adjust after testing. Tight stitches keep stuffing from showing.
Are crochet ornaments safe for children?
Treat them as decorations, not toys. Avoid hard parts like plastic eyes or beads if young children will be around, and embroider details instead.
How long does it take to make one ornament?
It depends on the design, your speed and your experience, so I can’t give a reliable number. Simple shapes are quick, and detailed ones with several parts take longer.
Can I make ornaments without stuffing?
Yes. Flat shapes (stars, hearts, snowflakes) can be made without stuffing and starched or stiffened if needed.
How do I make my ornaments last for years?
Use durable yarn, stuff firmly, secure your ends well, and store them dry and dark between seasons.
Can I sell crochet ornaments I make?
It depends on the pattern. Always check the designer’s terms before selling finished items made from their patterns, and credit them if required.
Final Thoughts
Crochet Christmas ornaments for beginners are a gentle way into amigurumi: small projects, simple stitches, and a satisfying result. Start with the round bauble, get comfortable with the magic ring and stuffing, and then move on to patterns with ears, hats, or tiny details. Before long you’ll have a whole tree’s worth of handmade decorations. Happy crocheting!
One Comment